Products You May Like
Receive $50 off an eligible $100 purchase at the Outside Shop, where you’ll find gear for all your adventures outdoors.
Sign up for Outside+ today.
Not every backcountry scenario is right for a campfire: After all, a little spark is all it takes to start a massive wildfire. Still, there are special circumstances in which knowing how to start a campfire—one of humankind’s first true skills—can save your butt. Fire provides warmth, light, and the ability to cook and boil water, making it pretty darn important when you’re out of alternatives.
Before venturing out, always check with the local ranger station, camp host, or visitor center to find out if fires are permitted where you’ll be traveling. Some areas never permit campfires, and others prohibit fires during the dry season or when wildfire risk is high. Never bring in wood from outside of the area you’ll be camping in: It’s an easy way to spread invasive beetles, fungi, and other pests.
Find fuel
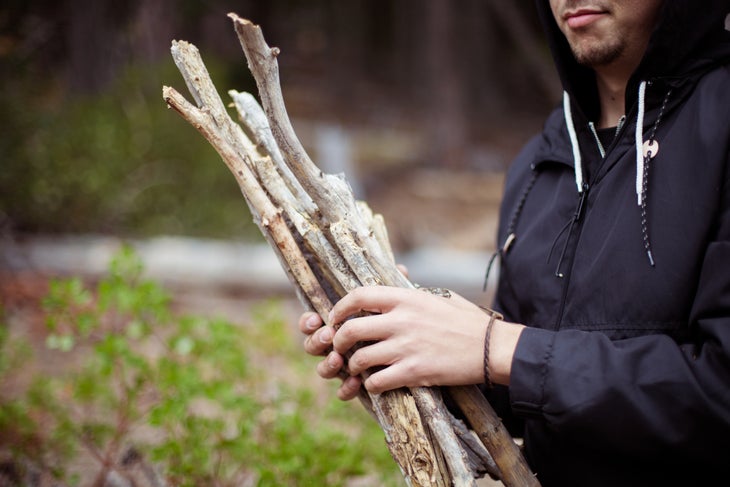
You don’t want to get a fire started only for it to fizzle out for lack of fuel. Step one of any fire-making expedition involves gathering the best driftwood or deadfall you can get your hands on. Many state and national parks prohibit gathering firewood outside of designated campsites altogether, so check with rangers before you head out to make sure that wood gathering is allowed where you are. Never cut live branches or trees—not only will they burn poorly, you’ll be damaging the forest around you.
An armload of dry, dead twigs and sticks (thumb-width or skinnier) will get the fire going, and a couple of armloads of wrist-thick wood will last the evening. Thicker than that, and you run the risk of your firewood not burning. Search for dry wood under rock overhangs and at the bottom of driftwood piles. If necessary, shave off wet bark with your pocketknife to get to the dry stuff underneath, or dry damp wood next to a fire after starting it with dry.

Find a pit
First things first: Always use an existing fire ring if possible. In many places, building new fire rings is illegal, and it’s always worse to start a fire in a new place. Can’t find a fire ring? In most places, that’s a pretty good sign that you shouldn’t make a fire; bust out your stove and lantern, and pull on another layer. That being said, if you’re really in a pinch, there are some emergency options.
If you’re near a beach, scoop out gravel or sand below the high-tide mark to create an LNT-approved fireplace. This leaves little risk for sparking any wildfire, and allows your ashes to be swept away with the tide. In the woods, find a flat space away from trees, clear it of any detritus, and construct a circle of rocks. Ideal surfaces are sand, gravel, or mineral soil. For a snowy landscape, dig a pit down to ground level, then construct a platform out of wood or stones at the bottom. If you have to construct a new pit, be sure to dismantle it when you’re finished.
Ideally, your fire should be built near a water source, so you have quick access to be able to douse it. If that’s not possible, keep at least a gallon of water on hand to quickly put out the fire if needed.
Rig a tarp
In inclement weather, this shelter will shield you, your woodpile, and your fire. A standard tarpaulin tarp will do, so long as you keep it away from the flames. Leave room for the smoke to escape on one side, with the other side protecting you and your goods. If the wind is blowing, set your tarp low to protect your fire from blowing rain.
Build
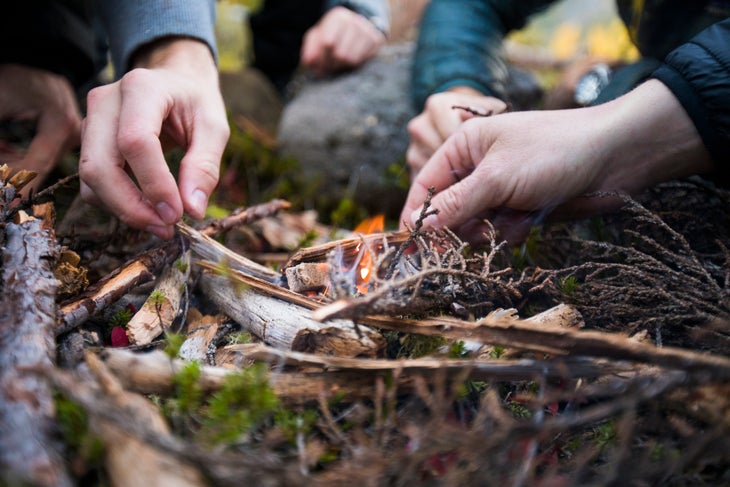
Finally, you can get started on the fire itself: First, place a handful of firestarter on a bed of sticks. Good firestarters will catch a spark easily: think dryer lint or cotton balls with petroleum jelly. Leave gaps for air to fuel the flames.
There are a few different shapes to arrange your wood into, each with different benefits and drawbacks.
The classic teepee, with a wide, circular base and wood arranged in an upright structure, burns hot and fast. This means it requires constant maintenance and uses fuel quick, but makes it perfect for quick heat and cooking tasks. To build, simply lean sticks against each other in a conical shape, igniting in the middle and adding more fuel to the outside as needed.
The log cabin creates a lasting fire with minimal effort. Put two logs in your pit parallel to each other, then stack two more on top perpendicular to them. Continue to stack logs to the desired height, then place kindling in the center square and ignite.
The star fire is perfect for keeping a warm flame going without much fuel. Create a small tepee fire with kindling, then lay four or five logs around it, one end in the fire and the other end leading away like the point of a starburst. As the fire goes, nudge the logs further into the center to replace what has been burned.
The lean-to works well in windy conditions, thanks to its built-in windbreak. Lay a thick log on the ground and place your tinder beside it, on the leeward side of the wind. Lean small sticks and other kindling against the log at an angle that goes over top of the tinder. When you light the tinder, it will catch the kindling on fire and begin burning the bigger log. Slowly add larger sticks to build up the fire, and add another full-size log when ready.
Ignite
Place a fist-sized stack of tinder (wood shavings, twigs, paper) over your firestarter, then light ‘em up. A lighter is ideal (bring two and keep them warm), but matches with the heads dipped in melted paraffin or purpose-made waterproof matches are a great waterproof backup. Make sure there is ample oxygen flow to keep the flame going, blowing softly into the base as needed.
Add Fuel
Carefully supply more tinder and larger sticks without smothering your nascent fire. Start with smaller, more flammable twigs and sticks, then move to wrist-width wood once the fire is properly going. For quick heat, add kindling directly on top of the fire. For more radiant, longer lasting heat, add larger fuel on the sides of the fire around the base. Protect it from the wind, and blow on it gently to fan the flames.

Burn
Enjoy the warmth, comfort, and satisfaction of your very own campfire, adding more fuel as needed. Let the wood burn down to ashes, keeping a continual eye on it (AKA, don’t go to sleep while your fire is still burning). Need an idea for what to do with it? S’mores are always a good idea. Try adding a little bit of verve to yours with ingredients like peppermint bark, fresh pear, and nutella.
Extinguish
Your fire must be completely out before you depart or go to bed. If you’re on the beach, let the high tide wash the ashes into the sea. Otherwise, create your own high tide: Use plenty of water to douse the ashes, then stir with a shovel or stick. Repeat that process until you’re confident the fire is out, then put your hand on the ashes to check. (Too nervous to touch? That’s a good sign that your fire isn’t out cold yet. Add more water and try again.) If you’ve had to create a new emergency fire ring, dismantle it, fill in any pit that might’ve been created, pack and crush any chunks of charcoal, and spread the remains over a wide area.
