Products You May Like
Receive $50 off an eligible $100 purchase at the Outside Shop, where you’ll find gear for all your adventures outdoors.
Sign up for Outside+ today.
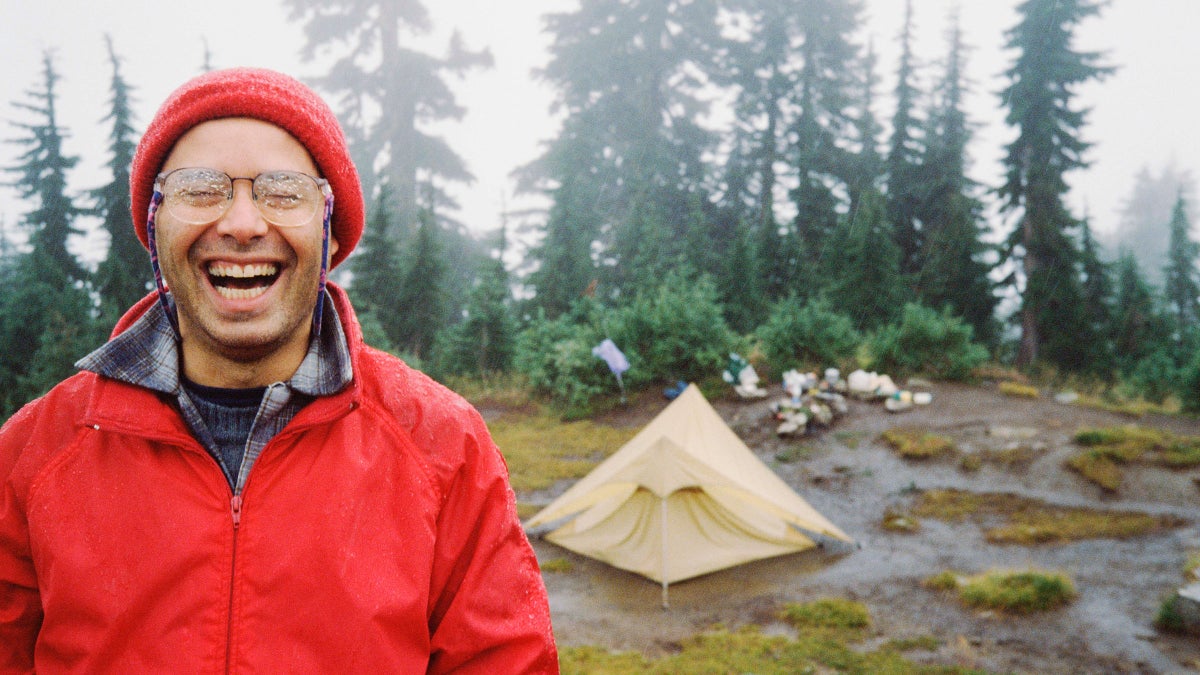
Everyone makes mistakes—it’s part of the learning process. (Just ask our staff, who have done everything from going peakbagging in cotton to camping in a thunderstorm without a working rainfly.) But make the wrong mistake in the backcountry and you could end up hurting (or at least seriously embarrassing) yourself. From packing problems to health and safety, keep a lookout for these 52 common errors.
Mistakes at Home
1. Burying Your Reservoir
Few flubs are more irritating than a leaky water bladder that soaks your pack on the drive to the trailhead. It happens when the pressure of other gear against the bite valve pops it open. So place the reservoir atop everything else en route to ensure it doesn’t get squashed. If your plastic bladder has a leaky seam or small puncture, you can repair it with Seam Grip—the waterproof sealant designed for tents. Empty the bladder first, and allow 24 hours for it to dry.
2. Not Bagging DEET-Based Bug Spray
Deet melts nylon and polyester and can damage harder plastics like buckles and water bladders, so toss repellents in a zip-top bag.
3. Overconfidence
According to a 2008 study of SAR missions in Utah national parks, fatigue, darkness, and insufficient equipment accounted for about 42 percent of rescue calls. Such mishaps, at their root, stem from foolhardy planning. So set sane goals and honestly estimate your hiking speed. Dan Westerberg, who leads trips for the Boston Appalachian Mountain Club, typically assumes an average speed of 1 to 2 mph, then adds 30 minutes for every 1,000 feet of elevation gain.
4. Not Setting a Turnback Time
This is a recipe for unplanned bivies. If you don’t reach the goal by the turnaround time, go back anyway. Note: The descent often takes half as long as theascent but that depends on terrain.
5. Not Being Able to Find the Trailhead
The more accessible the trailhead, the more crowded the trail. So finding solitude often means navigating remote, mazelike dirt roads. “For turn-by-turn directions to a trailhead, visit or call the local park or forest recreation managers,” says Diane Taliaferro, recreation manager at Santa Fe National Forest. They’ll also provide info about 4WD tracks, washed-out roads, and theft-prone lots.
6. Bringing a Leatherman in Your Carry-On
Find rules for knives (plus stoves and fuel) at tsa.gov.
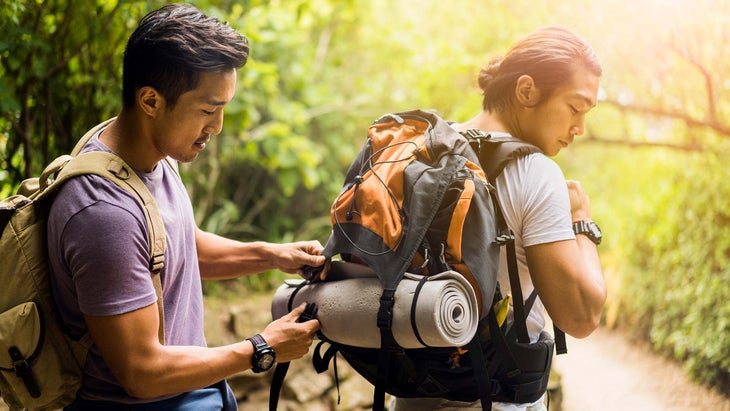
7. Poor Packing
Get gear checklists for all types of trips (snow, desert, swamp, and more) courtesy of our experts. One universal tip: don’t bury stuff you’ll need easy access to.
On the Trail
8. Committing Crimes of Fashion
Ever notice how many stories about rescued hikers include the line, “The missing man was wearing jeans and tennis shoes”? Insufficient clothing contributes to about 10 percent of rescues in national parks. Avoid:
Wearing cotton Once damp, it stays damp, sucking away body heat. Opt for adjustable layers of wicking fabrics like wool and polyester. Layering order goes: longsleeve (or tee), pullover, down jacket and/or rainshell, and hat and mitts for quick microadjustments.
Starting with too many layers Ten minutes into the hike, you’ll be overheating and need to shed clothing. Start from the trailhead a little chilled.
Letting yourself sweat The moisture on your skin siphons away warmth.
Not adding layers right when you stop You’ll soon be shivering.
9. Letting Your Water Freeze
Reservoir hoses require more work than bottles in frigid temps, so think twice about bladders. To avoid bottle freeze-up, stow them upside down in your pack.
10. Neglecting to Check the Forecast
Tragedies on Mt. Hood, Mt. Washington, and Denali spotlight the potential lethality of severe storms. Be prepared by getting a pinpoint forecast for your route at weather.gov (since frontcountry forecasts often don’t apply to the backcountry or high elevations). Note: Temperatures drop about 3°F for every 1,000 feet of vertical gain.
11. Ignoring Storm Signs
Watch for clues like winds from the south, developing cloud cover, and a freefall in barometric pressure (measured by an altimeter watch; some even have storm-warning features). If weather deteriorates, descend to safe, sheltered areas (lightning is attracted to isolated, pointy objects like lone trees, ridges, and summits).
12. Getting Separated
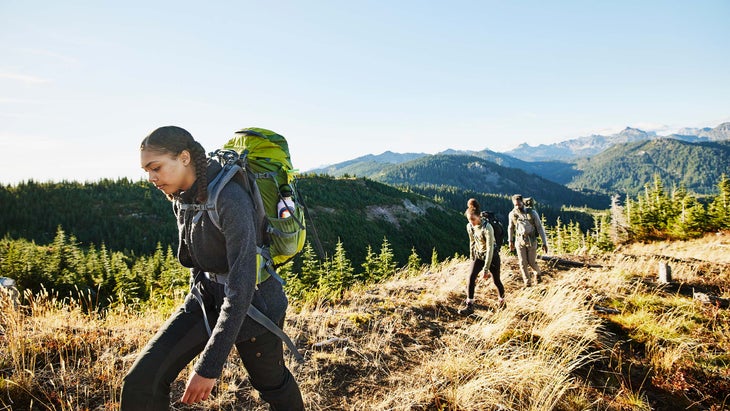
Letting the speed-demons blaze ahead while the slower hikers fall behind begs for disaster. If a sudden storm, darkness, a wrong turn, or injury befall you, communicating with other team members will be difficult or impossible. That’s why the “Start as a group, hike as a group, finish as a group” mantra is smart. Try these strategies:
- Cajole the speedsters to slow down, and put a person in front who sets a moderate pace.
- Designate a reliable sweeper to bring up the rear.
- Redistribute weight from slower hikers to fast ones.
- Agree to stop at every trail junction. Because spreading out is inevitable on any hike, this will reduce the chance of someone taking a wrong turn.
13. Glissading With Crampons On
If a point catches on the snow, you will likely break an ankle—or cut yourself badly
14. Making Dork Moves
- One minibiner or keychain thermo-compass is allowed. No more.
- Stuff dangling hillbilly-style from your pack ruins your balance and screams noob.
15. Not Using Sunscreen
Those skin-frying rays pass through clouds, so sunny or gray, reapply every two hours.
16. Climbing Out of Your Comfort Zone
What goes up doesn’t necessarily come down—especially on steep terrain. An Oregon dayhiker learned this last February when he ventured off-trail and got stranded on a ledge 350 feet above the Columbia River Gorge. Unable to move, he called 911 (his only smart move) and waited all night until rescuers reached him. He’s not an anomaly:
Cliffed-out hikers accounted for 11 percent of SAR missions in Yosemite in the 1990s. Prevent such ordeals by scanning the terrain ahead—and behind—to ensure you can return via the same route. Never take shortcuts you don’t know or can’t see the length of (like a gully on a peak). Most people find downclimbing harder than ascending because footholds are less visible. Four more tips:
- As you move up, memorize the hand- and footholds you use.
- Face toward the rock, not out, and test all holds to make sure they’re solid.
- Move your feet, then your hands so you stay in balance and not scrunched up.
- To get a better view of holds, lean out, arms straight and locked out
17. Putting Your Gaiters On Wrong
Stick buckles outside the ankle so they don’t trip you.
18. Beelining Up Mountains
Except on tiring-to-kick, hard snow, switchbacking is more efficient.
19. Trusting Pack Covers to Keep the Rain out
They leak. Instead, put gear in waterproof stuffstacks.
Navigation Mistakes
20. Not Double-Checking Your Position
Getting disoriented is easy. Just ask Civil War General Lew Wallace. At the Battle of Shiloh, he marched 25,000 Union troops the wrong way and ended up behind enemy lines. Hikers are no better: Lost or missing persons accounted for 42 percent of rescue missions over a recent three-year period in the White Mountains—even more than injuries. So use a map to verify your direction of travel after each turn. Do the topo lines indicate you should be climbing or descending? Should that peak be ahead of you or behind? What landmarks should you mentally (or digitally) photograph? Also check the sun’s position—it’s in the east in the morning, and the west by afternoon. Two routefinding Bermuda Triangles in particular are barren summits and open fields, where the intersection of multiple trails breeds onfusion. When you approach a summit or field, record your route’s compass bearing, or mark the path with a rock or stick so you can find your way back to it.
21. Getting Caught in the Dark
Nightfall means cold temps and difficult routefinding. To estimate how much daylight is left: Hold your palm at arm’s length and count how many fingers fit between the horizon and the sun. Each finger represents about 15 minutes. Example above shows one hour, 15 minutes until dark. If darkness descends, no worries—that’s what a headlamp is for. Just make sure you pack it.

22. Cutting Switchbacks
It causes erosion and can lead you (and others) off route. Tip: Sticks crossed like an X mean there’s no trail that way.
23. Taking Shortcuts
Alarm bells should sound when you hear any of these phrases: “Is this gun loaded?” “Jump it, you wuss!” and “Let’s take a shortcut.” Michael Hays should know. Last June, the Ohio hiker shattered his kneecap on an off-trail descent of Maine’s Katahdin. If not for vigilant rangers who noticed he was overdue, and a lucky helicopter flyover that spotted his orange poncho, Hays might have stayed there permanently. The problem: If you become lost or immobilized away from a known trail, rescuers won’t be looking in the right place. Is there ever a good time to take a shortcut? Maybe, if: You can see your destination and all the terrain in-between; have the skills to navigate to it or backtrack; and won’t be violating LNT ethics.
24. Forging Blindly Ahead
Few lost hikers try to retrace their path, deluding themselves that help is just around the corner. But backtracking to your last known point is the best way to get back on course.
25. User Error
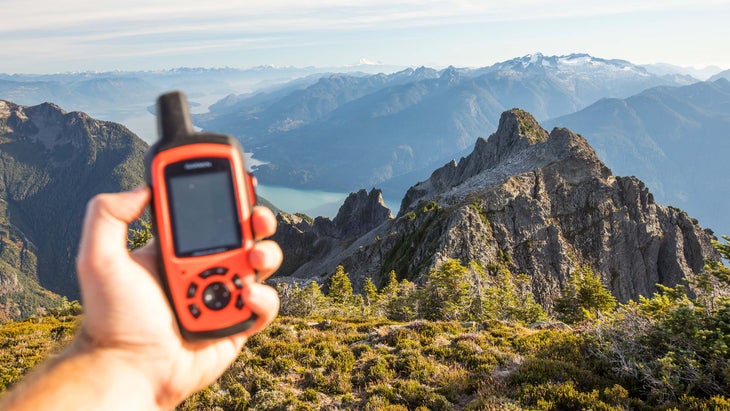
GPS is a fabulous tool—if you use it correctly. Two Mt. Hood hikers realized this in 2006 when they got lost in a whiteout using a GPS configured to conflicting datum settings and a compass declination set for New Hampshire, not Oregon. That’s why it’s vital to practice with compasses and read the GPS manual on how to import tracks, bombsite waypoints, and set preferences.
26. Not Using a Map on Familiar Routes
Even on trails you’ve hiked dozens of times, you can make a wrong turn. In fact, the more well-known a route, the more our brains tend to shut down. German researchers tested this using a driving simulation. As the subjects drove the same course multiple times, the parts of the brain involved with situational awareness became less active as the drivers memorized the route. The more you think you know a place, the less you actually think. So always bring a map or a color-copy of key sections. Print topos at backpacker.com, or buy local quads at outdoor stores or Map Express.
27. Settling for Bad Reception
Cloudy, rainy skies won’t block a GPS signal, but overhead foliage, canyon walls, and water on the antenna will. Find a clearing or highpoint, make sure the antenna is dry, then check what accuracy (in feet) you’ve obtained.
Mistakes in Camp
28. Pitching Your Tent in a Puddle
Waking up in a soggy sleeping bag is a definite buzzkill. To stay dry:
1. Pitch your shelter on dry, flat, well-draining surfaces, like pine needles, rock slabs, or bare dirt. The leakiest part of a tent isn’t the ceiling or walls, but the floor. When rain collects under the tent, the pressure of your gear and body lets it seep through the fabric. So avoid shallow depressions, spongy turf, and runoff zones, which pool water. If you’re using a footprint (a plastic tarp beneath the tent), tuck the outer edges under the rainfly to keep water from inundating it.
2. Waterproof the seams. If the tent or rainfly seams have lost their repellency, coat them (inside and outside) with a sealer like McNett Seam Grip, then reapply once a year.
3. Orient your tent so the smallest cross-section—usually the rear—faces into the wind. That tactic, along with staking out guy-lines, stops rain gusts from blowing droplets underneath the rainfly.
4. Pack the tent in this order: rainfly, canopy, footprint. So if you’re pitching it in rain and wind, the footprint comes out first, then you stake the canopy, and lastly you set up the canopy with the fly draped over it.
29. Packing Only One Lighter
If it fails, no stove or fire. And don’t forget good tinder, like dryer lint.
30. Not Gazing Up
Widowmakers kill. Pitch your tent away from dead trees and limbs.
31. Randomly Arranging Your Campsite
For max comfort and convenience, follow these organizational tips:
- To warm up fast on chilly mornings, pick a site with southern exposure, and avoid low spots since cold air flows downhill.
- Evade mosquitoes by picking open areas with breezes, sun, and no standing water.
- At campgrounds, grab a spot near the latrine and water spigot, but not so close (or on the main thoroughfare) that constant traffic—and odors—will bother you.
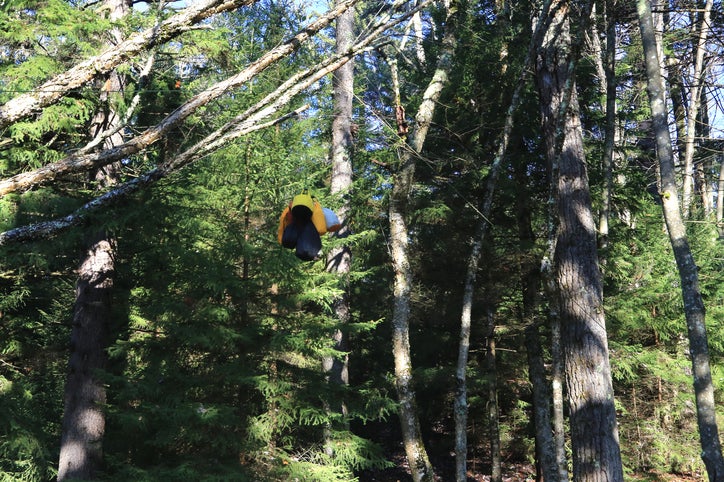
- Locate campfires and kitchen areas downwind from the tent to keep smoke and smells away from your sleeping spot. Hang bear bags 100 yards downwind from both.
- Site backcountry camps 200 feet (40 adult paces) from any trails, rivers, or lakes. This is also the distance catholes should be from campsite, trail, water, or drainage.
32. Drying Your Gear Wrong
- Don’t hang damp clothes inside your tent. They won’t dry. Place them inside your sleeping bag.
- Putting boots near the fire will crack the leather and melt the soles. Air-dry them upside-down.
- Don’t store a wet tent unless you want mildew. Hang to air-dry.
33. Not Staking Your Tent
Sudden strong winds can carry it afar; one editor lost his shelter over a cliff in Glen Canyon. On snow or sand, bury deadmen (guylined logs or rocks) instead of staking.
34. Not Buying a Warm Enough Sleeping Bag
If you sleep cold, you might need a bag rated 10°F below the nighttime low. An insulated mat also helps. Note: Bags lose loft with use, so launder yours every 40 nights or so.
35. Lazy Food Storage
A bear’s sense of smell is seven times better than a bloodhound’s—and the odor of jerky carries for miles. Ergo, hang a bear bag. Even if bruins aren’t present, proper technique will protect food from marauding varmints.
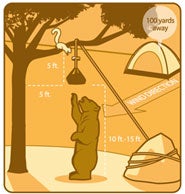
1. Before sunset, locate a suitable tree with a sturdy branch 15 to 20 feet off the ground. It should be at least 100 yards downwind from your campsite. Typically, deciduous trees offer longer, stronger branches than conifers.
2. Put a fist-size rock in a sock or glove. Attach it to a 50-foot nylon rope. Toss the cord over the branch. It should rest at least five feet from the tree trunk. 3. Tie or clip the bear bag to the rope and hoist away. Make sure the bottom of the bag is at least 10 feet off the ground. For more security, add a mouse hanger (p. 34); you can also throw the rope over a second branch on a nearby tree and tie the bag to the middle of the rope.
4. Wrap the rope end around the trunk several times. Tie it off with several overhand knots or hitches.

Health Mistakes
36. Ignoring Hot Spots
When heel pain flares up five minutes into the hike, do you keep moving? Many hikers are too rushed to stop, and most regret it later. The earlier you treat a hot spot—a skin irritation caused by excessive friction—the better your chances for a blister-free day. Stop and do the following:
1. Clean the skin around the hot spot with a damp, clean cloth.
2. Apply a self-adhesive, cushioned bandage like moleskin or 2nd Skin over the affected area and the surrounding skin.
3. Secure it with strips of tape or adhesive bandages. Real blister prevention starts at home: Wear new boots around the house and on short hikes. If hot spots develop during break-in, apply bandages and continue the process of toughening up skin and molding the boot. Also, experiment with different socks, insoles, and less-rigid trail shoes.
37. Stressing Out Your Knees
Not using poles. Kinesiology studies show they cut posthike soreness.
Setting poles too long. Your elbows should bend 90 degrees. (Lengthen for descents so you can lean on them.)
38. Hiking in Wet Socks
Soggy skin blisters faster; change into dry socks asap.
39. Buying Boots That Are Too Small
Feet swell a ½ size by afternoon. Size shoes accordingly.
40. Touching Poison Ivy
Most people are at least somewhat allergic. Learn how to identify, avoid, and treat it with Backpacker’s guide to poison ivy.
41. Stepping Carelessly
Almost 80 percent of the injuries Yellowstone records are leg sprains, strains, abrasions, and lacerations. Takeaway: Watch your step. To prevent a stumble, wear high boots, use poles, and cinch balanceskewing gear dangling from your pack. And scan the trail for rain-slick tree roots, wet leaves, and ice patches. Improve balance by doing proprioception (sensing your body’s movement and orientation) exercises, like standing on one leg for five minutes (bonus points for eyes closed).
42. Treating a Cell Phone as a Lifeline
Though mobiles can save your bacon, they can also encourage risk-taking. So drop it in a zip-top bag and forget you have it until an emergency. For best reception, head to high ground and hold the phone away from your body, which can block the signal. If you get a signal, return to the same spot for calls; your phone will remember the tower locations. Save battery life by texting, and keeping it turned off and warm; for smartphones, also dim the screen and disable syncs and apps.
43. Lugging a Giant First Aid Kit
For weekend hikes, a wallet-size kit—that you know how to use—suffices, while a toiletry bag-size pouch works for longer trips or larger groups. To downsize, replace supplies you can improvise (like triangular bandages) with essentials like more adhesive bandages, duct tape, ibuprofen, moleskin, sterile gauze pads, antibiotic ointment, antihistamines, antidiarrheal medication, tweezers, safety pins, hand sanitizer, and sugar.
44. Burning Ticks
Don’t touch a match to the tick’s butt, like the old myth suggests. That burns the body while leaving the head embedded (and putting you at risk for a burn). Rather, use tweezers flush against the skin, and grasp the bugger perpendicular to the long-axis of its body, then gently pull straight out.
Food Mistakes
45. Eating Blah Meals
Plain noodles do not a dinner make. Break out of your rut by adding tasty items like dried fruits and veggies; precooked packets of chicken or fish; cheese (hard ones last a week); nuts; tomato paste tubes; and packets of spices (Italian, Mexican, Asian). Here are three ideas:
- Soy-sauce-flavor ramen, plus peanuts and two tablespoons peanut butter
- Wild rice, chicken, craisins
- Instant potatoes, cheddar, tuna
46. Wasting Fuel
Up efficiency with liquid-fuel stoves by using an aluminum windscreen. Don’t put screens around canisters (they can explode), but cook in a sheltered spot
47. Packing Too Much Food
Aim for 2.5 lbs./person/day and 4,000 calories.
48. Running the Tank Dry
Carry at least three liters of water on any hike over five miles, or during hot or humid conditions. Also, don’t assume you’ll find water along the trail. Check with maps, guidebooks, and rangers to locate reliable sources.
49. Foiling Your Water Filter
- Not backflushing: When your filter slows down or gets harder to use, reverse the flow valves and pump several times to clear out grime. (Follow your pump’s instructions.)
- Pumping silty water: This will clog your purifier. Use a prefilter, or wrap a coffee filter around the pump’s nozzle, or let dirt settle in a pot before pumping.
- Collecting H20 at trail crossings: Move several yards upstream to reduce contamination from passing hikers.
50. Using a Knife as a Lever
Snap! goes the tip.
51. Not Bringing Enough Fuel
Figure about 2.5 oz. per person per day in summer, and 7.5 oz. in winter
52. Making Hydration Blunders
- Letting water freeze: On subzero nights stow bottles in sleeping bag.
- Not replacing electrolytes: Low levels of sodium (lost in sweat) can cause sometimes-fatal hyponatremia. Consume salty foods or sport drinks.
- Getting dehydrated: An active person loses two liters per hour in very hot weather, and about half a liter in temperate conditions. Drink enough that your pee is nearly clear.
- Failing to toast at trip’s end. Our staff splits between Scotch (ultralight) and a trailhead cooler (ultrarefreshing).
Originally published in 2018; last updated in February 2022
