Products You May Like
Get full access to Outside Learn, our online education hub featuring in-depth fitness, nutrition, and adventure courses and more than 2,000 instructional videos when you sign up for Outside+
Sign up for Outside+ today.
The year is 2022; I’m following a set of instructions from a 1973 issue of Backpacker, which is telling me, “if the mountain men could do it, you can, too.” As I fumble my way around a sewing machine and tangled wads of thread, those words feel more like an insult than encouragement. Have we, as consumers of ultralight French presses and 1-pound camp chairs, lost our last drop of self-sufficiency? Did everyone in the seventies know how to sew a flat-felled seam? Is it worth making your own gear anymore? To find out, I set out to re-create a series of DIY projects pulled from deep within this magazine’s archives.
Want to make this gear yourself? Get the original instructions.
One-Person Backpacking Tent
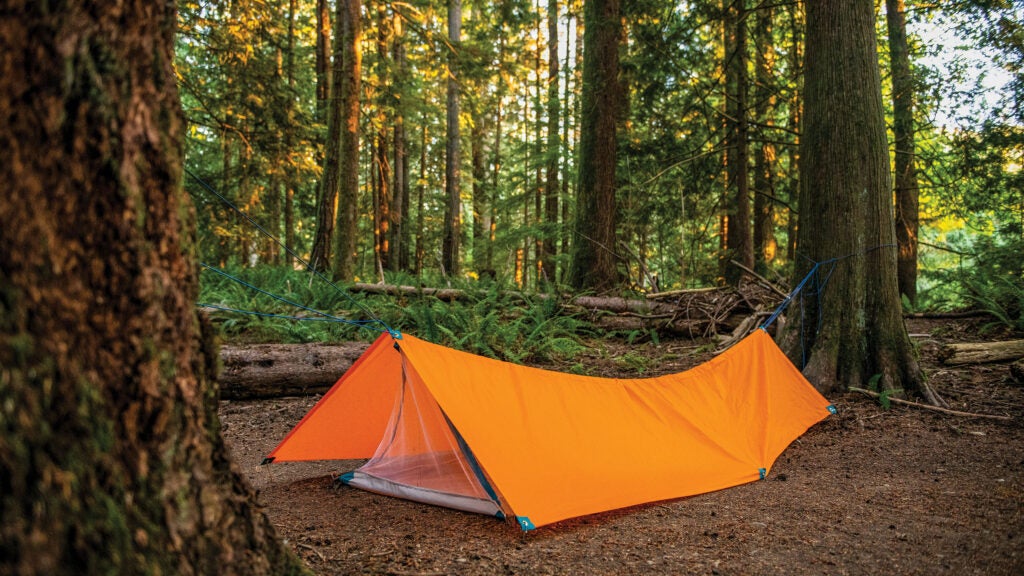
I started with the most complicated project. After a trip to my local fabric shop where I cleaned out their supply of ripstop nylon and mosquito netting, I had my colorway and materials dialed. At first I thought a small tent would be straightforward; I was very wrong. If, like me, you have little to no sewing experience, what seems like a simple project can quickly go south. But before I even set my first stitch, I realized this wasn’t going to be easy.
I hit my first snag while measuring and cutting the panels for the bottom and sides of the tent. With a tapered profile, the pieces of the tent are triangular. Simple enough—until I realized that the directions left out important measurements. To find the dimensions that had been left on the cutting room floor by a careless (though probably well-meaning) copy editor, I had to do something I haven’t done since high school: use trigonometry. Luckily, after a quick Google search I had the equation in hand and found the missing dimensions. Though if it were 1973 and you snoozed through geometry, you’d be up a creek, or you’d have to wing it—a dangerous game. When it comes to the Golden Rule of DIY projects—measure twice, cut once—sewing is particularly cruel to slackers.
With the math out of the way and my pieces cut, I was ready to start sewing the mosquito netting, which makes up the majority of the tent structure. Netting, it turns out, is a nightmare to work with. It’s a very dynamic, stretchy material that renders your careful measurements useless. Halfway through stitching the first side to the ripstop nylon bottom, I had no choice: I had to improvise.
Despite the problems posed by the netting, I managed to finish only a few inches off from where I needed to be. I no longer envisioned a perfect, “Wow! You made that yourself?!” result; I’d have to shoot for an “I guess it’s better than nothing” one. A few inches off here and there would do.
I managed to sew the rest of the tent together with a steady, but not fatal, amount of errors. I stitched the flat-felled seam (a common, durable type of stitch used on jeans and other apparel) wrong more often than not, and bugs will surely find their way in around the ends of the zippers. But by the time I began hemming the rain fly, I’d hit my stride and was laying down straight (even professional-looking) stitches, putting the sewing machine pedal to the (proverbial) metal.
The tent’s pitch was simple, using only stakes and paracord tethered between two trees. It’s a modest, albeit cozy, structure. Looking at my tent in its natural environment, I wondered: Was it worth it? For the cost of the materials (nearly $200) and the amount of time, my answer in 2022 is: probably not. With so many high-quality shelter options available, it’s hard to justify putting in the effort to make your own tent. But in 1973? This might have been your best option for a lightweight, backpacking-specific tent. Lacking the options we have today, perhaps backpackers then were naturally more self-reliant. If you didn’t know the Pythagorean theorem or how to sew a flat-felled seam, you needed to ask a real person. Building your own tent is about more than flexing your thrift—it’s about taking matters into your own hands, tapping into your community for knowledge, and learning new skills that will be useful for a lifetime.

Ditty Bag (Stuffsack)
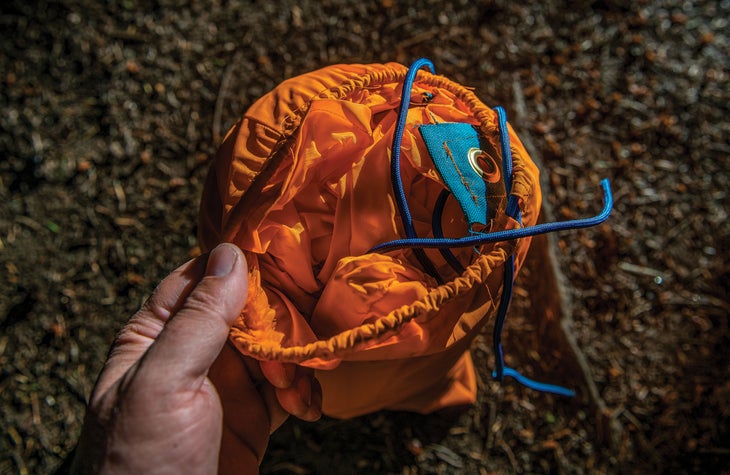
With the difficult project out of the way, it was time to do what I should’ve done first: a simple, beginner-friendly stuffsack. Working with ripstop nylon alone proved to be far easier than trying to stitch two different types of fabric together. In less than 20 minutes I’d whipped out a durable sack just big enough to fit my newly minted tent into, complete with a paracord drawstring and matching colorway. It was so easy to make that in no time I assembled a second one to hold the tent stakes.
I asked myself the same question as after making the tent: Is this something worth making on your own? The answer this time: absolutely. Stuff sacks are by no means the sexiest piece of backpacking equipment, but they’re incredibly useful, and, at least for me, just as easy to lose. You may also have a tent or sleeping bag that’s harder than it needs to be to stuff into its original sack; in 30 minutes you could make one that fits just right. You can personalize the colors for different types of gear, making it easy to organize and find supplies in your bag. With how quickly, easily, and cheaply you can make your own stuff sacks, it’s a no-brainer to recommend this project to set you down your own DIY path.

Backcountry Bakery
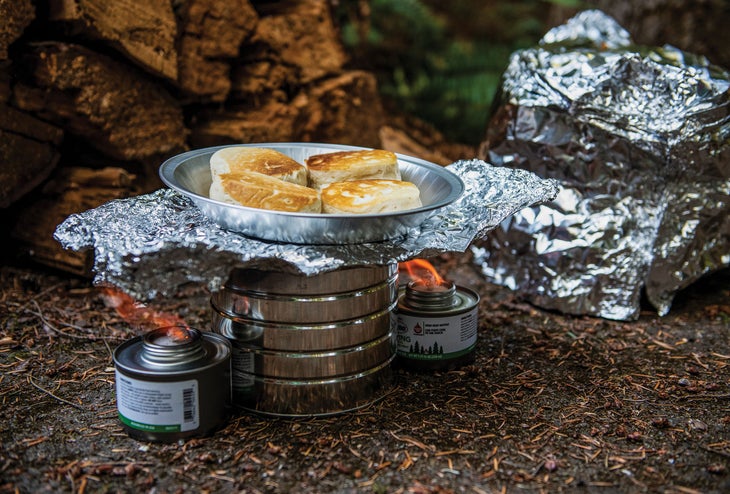
The article titled “Make a Backpacker’s Pantry” from the January 1985 issue of this magazine boldly claims that all you need to bake bread in the backcountry is a few cans of Sterno, aluminum foil, and an empty coffee can.
The instructions tell you to fold the foil lid into the shape of a hat. If your significant other, neighbor, or a fellow camper expresses concern about your choice of headwear, reassure them that it is not a hat—in fact, it is an oven. The original article states that, “if it resembles a rumpled, oversized Spanish conquistador’s helmet from some third grade school play, then you did it right.” Mine looked more like the hats worn by employees at In-N-Out Burger, who regardless of your diet, are objectively better than the conquistadors, so I rolled with it.
With the oven assembled, I had one last consideration: What to cook? The original article specifically mentions Betty Crocker Snackin’ Cake, which according to a 1970s magazine ad, is, “something special to eat; nothing much to clean up.” This sounds like a backpacker’s dream, but alas, there was no trace of a Snackin’ Cake in my local grocery store. I settled on a roll of Pillsbury buttermilk biscuits, to be baked in a disposable (but in this case reusable) pie pan. I put two Sterno cans next to the coffee can pedestal, a layer of foil over the fuel to deflect the heat, and then the biscuits, topped with the tin foil hat I had assembled earlier.
I didn’t have the highest expectations, but this simple baking method exceeded them on all accounts. Not only did the biscuits cook in almost the same amount of time they would have in a standard oven, but they tasted just the same: flaky and crisp on the outside and warm and buttery on the inside. In addition to simple baked goods, this would be a great method for cooking other meals, from a fresh-caught trout to a stew. The foil is reusable, and the fuel is efficient to boot, making this a sustainable cooking method that’s lighter and cheaper than most commercial camping ovens. It can also double as a camp stove if you don’t own one, or you just need an extra burner for a large crowd. With a few simple materials, you can easily impress your friends in the backcountry, and even earn a few (literal) brownie points.
