Products You May Like
Heading out the door? Read this article on the new Outside+ app available now on iOS devices for members!
Download the app.
In the 50 years since Backpacker published its first issue, the hiking world has evolved in all sorts of ways. Breathable trail runners eclipsed stiff leather boots. Leave No Trace principles have become standard practice. Even the way we eat on the trail has changed: When the first issue of Backpacker hit newsstands in 1973, there was no such thing as a freeze-dried meal aisle in REI. It was up to the individual to figure out how to fuel in the lightest, cheapest, tastiest way possible. Even today, cooking and eating are among the greatest joys of backcountry travel. That’s why camping recipes have always been fan favorites amongst Backpacker readers, and still remain a part of our editorial bread and butter (pun intended).
In celebration of five decades of the finest hiking journalism, I paged through old issues of our magazine with a goal in mind: to cook up and sample a selection of the most outlandish or outdated recipes we’ve ever published. Many that I stumbled upon were reader submissions, and I had to wonder: did the editors even test these meals? I can’t speak to American preferences of 50 years ago, but I can say that some of these recipes made me glad that there’s been innovation in the world of backcountry dining. But I picked up my spork with an open mind; nothing makes food taste better, after all, than a day on the trail.
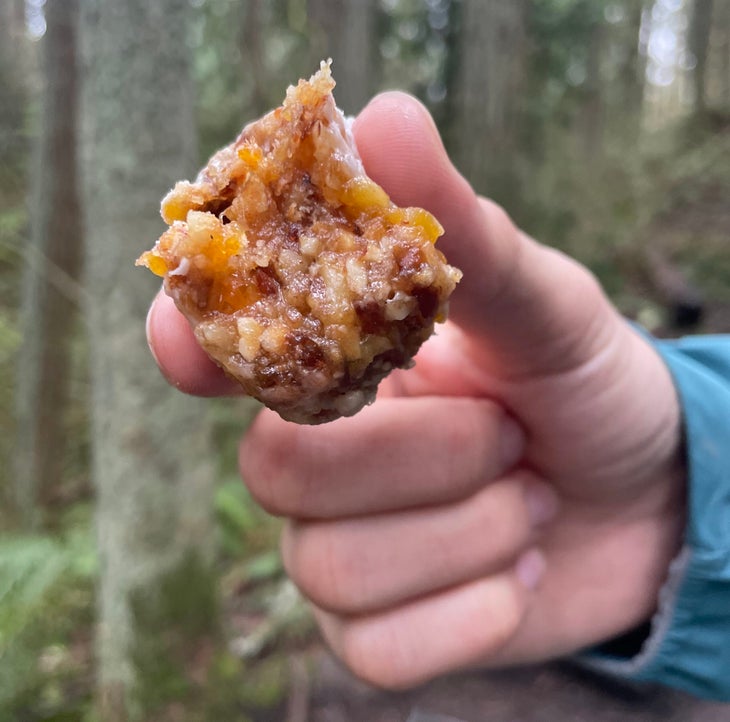
Mountain Bars
Original recipe:
2 cups crushed vanilla wafers
1 ½ cups finely chopped nuts
2 cups powdered sugar
½ lb. finely chopped dates
1 cup finely chopped dried apricots
1 cup seedless yellow raisins
2 Tbsp. light corn syrup
6-8 Tbsp. honey
½ tsp. vanilla or maple flavoring
Water
Combine all ingredients in a large bow (saving water till last). Knead. Press and shape into small log rolls about 2 by 5 inches. Roll in powdered sugar and wrap in plastic. Store in refrigerator.
This snack recipe from a 1978 issue of the magazine felt especially promising. Economical and light on packaging, homemade bars are something I can get behind. Plus, the ingredients list is packed with items you’re likely to find in my food bag on any given hike—nuts and dried fruit will never go out of style.
These were simple enough to whip up, but I found myself wishing for a food processor instead of having to chop all of the nuts and fruit by hand. The mixture was soft and sticky, but I managed to roll it into balls (which seemed more convenient than the logs that the recipe suggested), and popped them in the fridge until my next hike.
As soon as I took the first bite I could feel my blood sugar spiking. I’ve got a massive sweet tooth, but these were too cloying for my taste. With a heap of powdered sugar, sweetened cookies, corn syrup, and honey on top of the fruit’s natural sweetness, these are absolutely bursting with sucrose. Sometimes on the trail, though, that sweetness is just the energy boost you need. I’d make these again and cut down on the sugar, plus add some more dry ingredients (like the Nilla Wafers) as a binding agent: I stowed a few of these in my coat pocket on a ski day, and they turned into pancakes.
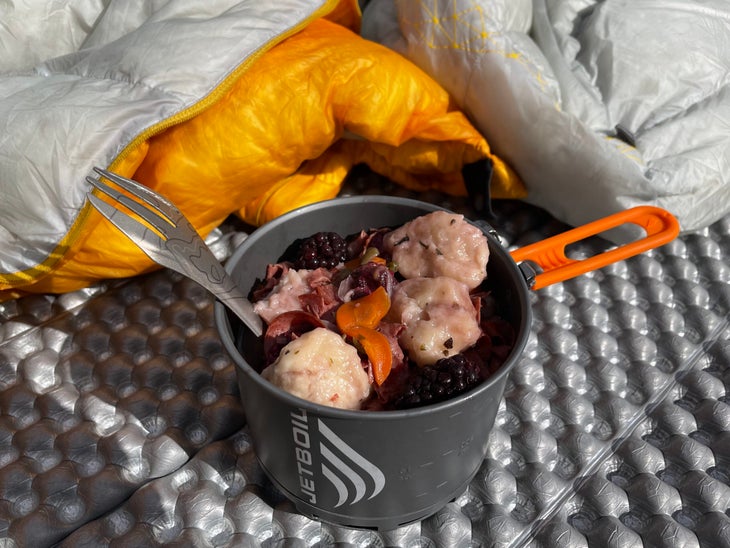
Beef and Berry Stew with Dumplings
Original recipe:
6 oz. dried beef
2 to 3 cups water
2 Tbsp. dried onions
2 Tbsp. dried bell peppers
¼ cup dried tomatoes
2 Tbsp. dried carrots
2 Tbsp. dried celery
Pinch basil, thyme, and parsley
1 cup berries (any variety, but huckleberries are best)
2 Tbsp. cornstarch
Rinse excess salt off dried beef. Discard salty water. Cut or tear beef slices into small pieces. Add about 2 cups fresh water to large pot. Add rinsed, shredded beef and all dried ingredients and herbs. Cover and bring to boil. Reduce flame and simmer for 15 minutes. Add more water if needed (there should be enough water to cover all ingredients). Add berries. Slowly stir in cornstarch (to thicken mixture). Add in drops of dumpling mixture, cover and cook an additional 10 minutes. Serves two to four.
Dumplings:
1 cup flour
1 tsp. baking powder
2 ½ tsp. Shortening
Pinch salt
½ cup water
Pre-mix all ingredients except water and store in a large plastic bag with twist-tie top (grocery store produce bags work great). Once in camp, add water to bag and knead mixture to form dough. When stew is ready, cut one corner off the bag and squeeze dough in large drops onto surface of boiling stew.
Naturally, I had to try a recipe from 1996, my birth year, and this one seemed like just the ticket. Some of my best backcountry memories are of foraging berries in the deep woods, but I’ve always eaten them raw or used them to cook something sweet like a blueberry crumble or pancakes. But berries in a stew? That was new to me.
More than the berries, what concerned me was the jar of dried beef I picked up from the grocery store. If I was expecting jerky, but I was off the mark: When I cracked the lid, the meaty odor that wafted out seemed off in a way I couldn’t quite put my finger on. Open mind, I reminded myself.
In the end, preserved meat did give a strange flavor, lending an overpowering saltiness to the stew. (I would have preferred dehydrated ground beef.) The berries, on the other hand, blended in nicely, turning everything a delightful purple hue.
Still, the stew was easy to put together, and relatively nutritious with lots of dehydrated vegetables. The dumplings were the shining star of the dish: They added pillowy pockets of carbs and upped the calorie count. I might steal the dumpling recipe to add some calories to other prepackaged soup meals.
I’m willing to accept that this meal might be tastier at the end of a long hike. In the end, though, I’d rather use trailside-harvested berries for a makeshift crumble, oatmeal addition, or best of all, eat them straight off the bush.
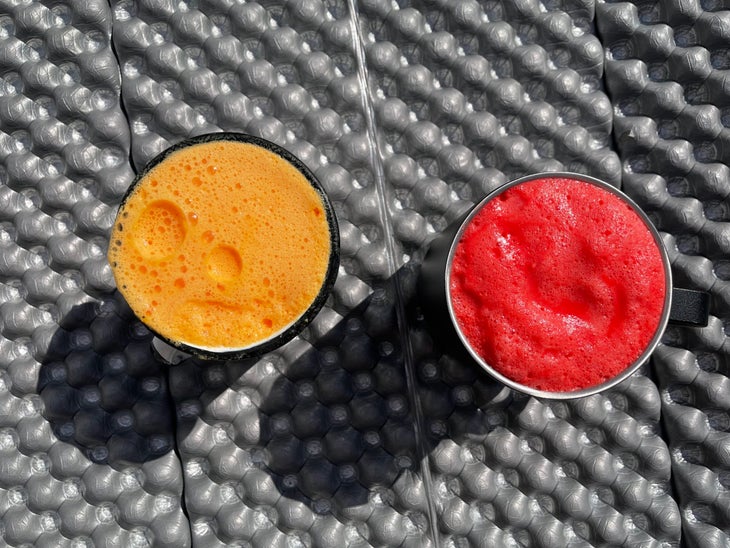
Frothy Fruit Drink
Original recipe:
The ingredients are simple: a packet (or ½ cup) of powdered pre-sweetened fruit flavored drink (Kool-Aid, Wyler’s, etc.) and enough non-fat dry milk to make one quart liquid.
In a one-quart plastic bottle pour about a half-cup of water, then the dry ingredients, slosh around a bit, and fill the bottle about two-thirds full with water. Shake vigorously, fill the bottle to the top and give a few more shakes.
The author of this two-ingredient recipe from 1975 claimed it would taste like a milkshake. As someone who craves a milkshake literally every time she sets foot on a trail in summertime, I thought that was a high bar. The thought of Kool-Aid and powdered milk made me squirm a little, but if a recipe claims it can satisfy my Dairy Queen cravings on the trail, I’ll give it a try.
Unfortunately, I couldn’t find root beer-flavored drink mix, so I opted for three different varieties of Kool-Aid—cherry, strawberry, and orange—for what I hoped would make a creamsicle-like drink.
Things immediately went wrong. First, I neglected to pay enough attention to the ratios on the Kool-Aid packet, and didn’t add enough water. (Also, did you know they tell you to add even more sugar to that stuff? I regretfully ignored the recipe’s call for “pre-sweetened” mix.) If the neon pink color and cough syrup smell didn’t tip me off that I needed more water, my first sip definitely did. Rather than a creamy, smooth treat, I got a tongue-punch of gritty sourness. I immediately spit it out. Even when I added sugar, more milk powder, and water, this drink didn’t do it for me: While the dry milk added a nice foam topping, the Kool-Aid flavor overpowered any creaminess. I’d be interested to try this technique with instant coffee for a latte-like concoction. For now, I’ll stick with plain lemonade and a stop by the scoop shop on the way home.
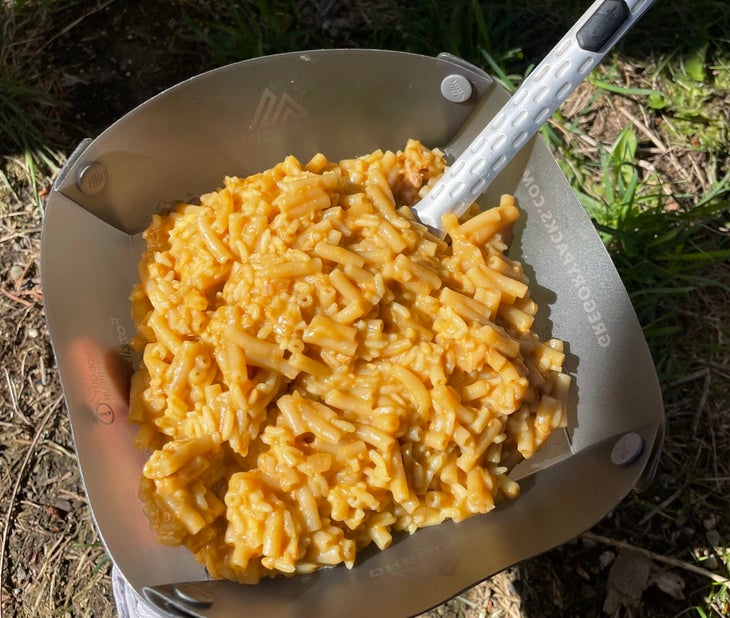
Devils Thumb Stew
Original Recipe:
4 cups water
1 pkg. Lipton’s dry vegetable beef soup
1 Kraft’s macaroni and cheese dinner
1 can tuna
½ cup minute rice
Bring water to boil; add soup mix and macaroni. Simmer until macaroni is about half done. Add cheese and tuna; then enough rice to obtain desired consistency. Cook until macaroni and rice are done. Yields four large servings.
This recipe, originally published in the winter 1975 issue, gave me the most trepidation. Beef soup? Good. Tuna? Pretty good. Mac and cheese? There’s nothing better. But all of those together? I wondered why anyone would ruin a perfectly good Kraft dinner. The recipe writer claimed that it was so good, he’d even cook it up at home. I decided to trust him.
As I stirred in the last ingredient, I couldn’t help but notice that the bubbling mixture perfectly resembled, both in color and texture, a big ol’ heap of vomit. My dog sniffed at the air hungrily as I turned off the burner.
The portions were certainly generous, and I worried about wasting food. But the Devil’s Thumb Stew served up a pleasant surprise. I can’t say it was delectable, but it tasted much better than it looked (and smelled). I’d worried the competing flavors would be overpowering, but somehow, they worked in near-harmony. While the tuna stood out, everything else melded together to a generic, almost bland saltiness. I poured on some hot sauce to kick things up a notch; some dehydrated broccoli would have rounded it out nicely. While I might not (OK, I won’t) cook this up at home, it’s a calorie bomb that would certainly satisfy on a cold night in camp (though I’d still prefer plain macaroni and cheese).
At the time it was originally published, the author claimed this meal cost a mere 38 cents per helping. Thanks to inflation, I paid more like 94 cents per serving, but compared to $16 commercial backpacking meals, I’ll take it.
Molasses Hardtack
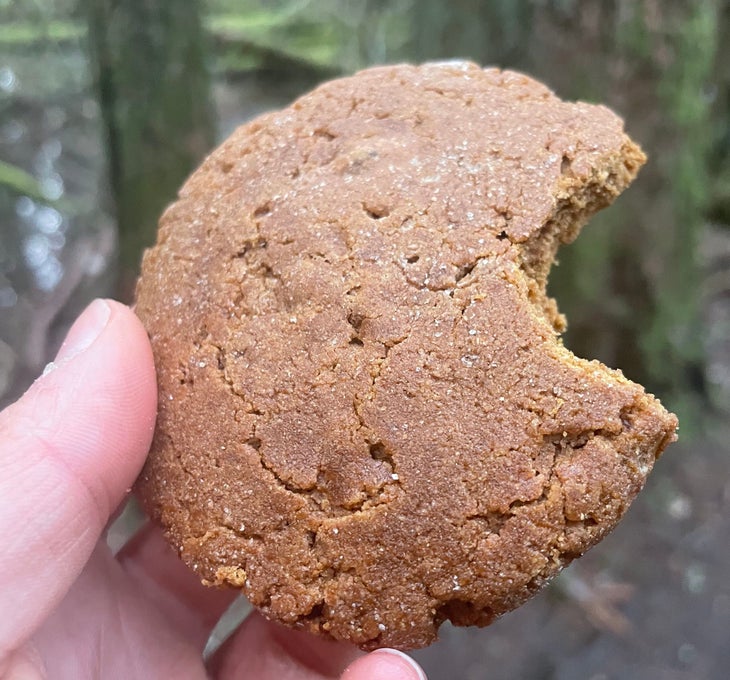
Original recipe:
1 tsp. baking soda
⅔ cup cold water
2 eggs
2 cups molasses
⅔ cup shortening (melted)
1 tsp. ginger
5 ½ cups whole wheat flour
1 cup raisins
Dissolve baking soda in cold water. Place in large bowl; add eggs, molasses, melted shortening, and ginger. Mix well. Add flour and raisins. Mixture should be stiff. Roll one heaping tablespoon of dough in flour until it is 5” long. Place on cookie shoot and flatten with spatula. Roll and flatten rest of dough. Bake in 350° oven about 15 minutes. Makes 18 or 20 biscuits. Store in plastic bags and take on the trail.
Snacks are arguably my favorite part of hiking, so I was excited to try this recipe from October of 1978. It’s certainly “classic”: Soldiers and sailors have been consuming hardtack since the 1600s. Slabs of dry biscuit from the American Civil War are still on display in history museums.
The biscuits were easy to bake, but following the recipe strictly, mine came out slightly soft in the middle instead of dry and hard. I made the mistake of letting their cookie-like appearance fool me: My hardtack tasted more like molasses-tinged cardboard than the Christmas cookies of my childhood like I’d hoped. I actually wished I had added extra raisins just for a hint of sugar. When I ate some with the Mountain Bars, their blandness balanced the sweetness perfectly.
The verdict: If I were a Civil War soldier or an underfed sailor in the 1700s, I’m sure this hardtack would taste delicious. But with so many long-lasting and delicious options out there, these won’t be making it into my regular rotation.
