Products You May Like
Dyneema (formerly known as Cuben Fiber), sounds a bit like science fiction on paper. By weight, it’s 15 times stronger than steel. Not only does it have an incredible strength-to-weight ratio, but it’s also highly chemical-resistant, and won’t stretch or sag during prolonged use or when exposed to water (usually a good thing in outdoor equipment). However, this super-fabric also results in sky-high costs for products that incorporate it. Wondering if Dyneema is worth the spend? Use this handy guide to determine if it’s for you, as well as tips on how to care for this special material.
What is Dyneema, anyway?
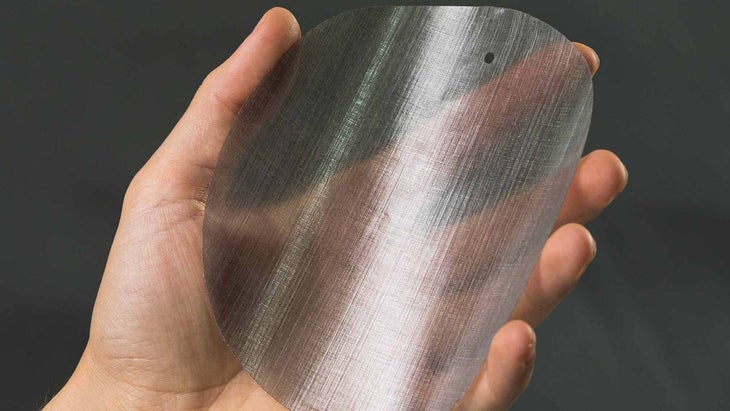
Dyneema is a series of polyethylene fibers—basically, high-tech plastic—most commonly used as a fabric or webbing in backpacking and hiking applications. It’s created in something called a “gel spinning process” where the fibers are “drawn, heated, elongated, and cooled,” according to Dyneema’s parent company, Royal DSM.
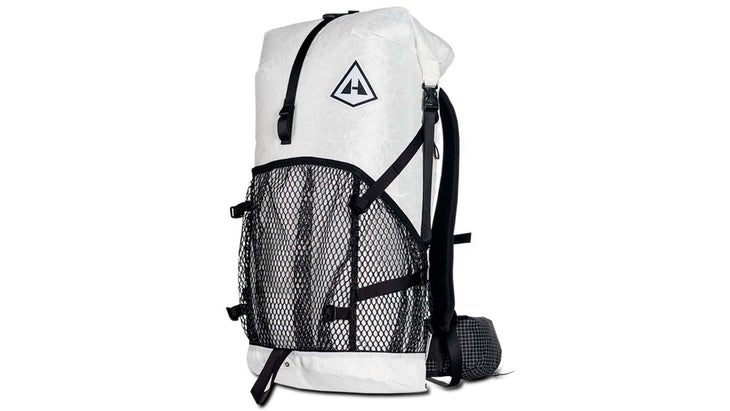
For backpacking gear purposes, Dyneema fibers are usually sandwiched between two layers of polyester laminate, which makes the already super strong fabric more durable and abrasion-resistant. Hyperlite, Big Agnes, Zpacks, Gossamer Gear and others use this crinkly, waterproof, almost translucent material in shelters and backpacks to make some of the lightest and strongest gear on the market.

Why is it so expensive?
You might’ve noticed that products with Dyneema are rather costly. For example, Big Agnes’s Tiger Wall 2 Carbon, a two person backpacking tent with a Dyneema floor and fly (and carbon fiber poles), goes for $1,000. The Tiger Wall UL 2, made of silicone-nylon, retails for $400. A 50 liter Dyneema backpack, the 2400 Windrider from Hyperlite Mountain Gear, starts at $320, while another thru-hiker favorite, the non-Dyneema 54 liter CDT from ULA Equipment is $180.
General pricing standards aside, you’ll almost always pay more for Dyneema-based gear. The exclusive patent that Royal DSM has on Dyneema explains, at least partly, why it’s more costly than other materials, as does the high demand for everything from climbing ropes to industrial applications.
How to make your own Dyneema equipment
If that Dyneema Zpacks tent you’ve been eyeing is a bit out of your price range, consider taking a DIY approach to constructing your own gear.
Depending on the design, panels of fabric can be attached to each other via taping or sewing. The company says taping Dyneema can result in seams that are stronger than the material itself when properly cured. In the case of heavier denier Dyneema materials—like those laminated to a polyester fabric—the best strategy involves sewing, followed by the application of Dyneema tape to ensure the fabric is waterproof. Check out a tutorial from Dyneema on how to work with the fabric here.
When sewing Dyneema fabrics, there are a few tips to remember. First, when pairing two panels together for sewing, connect them with loose-leaf folder-style binder clips rather than pins—you don’t want to add any additional holes in the fabric. (This is in contrast to working with nylon and other woven fabrics, where you push a needle through the weave of fibers.) Secondly, since Dyneema fabrics are often slippery, you should use a walking foot on a sewing machine, which helps push through the top layer of fabric at the same rate as the bottom to ensure the two pieces of fabric stay aligned.
If you’re interested in sewing your own gear, there are plenty of resources out there. (One of our editors made a passable ultralight pack using silnylon with help from the internet.) You can find inexpensive patterns at Stitchback DIY Trail Gear and fabrics and some guides at Ripstop By the Roll and others.

How to care for your Dyneema products
Although it’s bomber on the trail, Dyneema’s weaknesses reveal themselves in the laundry room. Chief among them is a relatively low melting point. That makes it easier to use thermal methods of bonding pieces together with tape, but also means that you don’t want to iron the fabric on a hot setting, dry it in a dryer, or use it where friction can heat it to its melting point—like for use as a guy line or a rappelling backup. The fabric also lacks stretchiness, which can be a liability outside of its intended use. Basically, if a piece of Dyneema equipment gets stuck on any part of a washer or gets too hot in the dryer, it can be compromised or even destroyed.
We strongly recommend hand-washing any gear made with Dyneema in a tub or bucket with warm-to-cool water using a mild, scentless detergent, like Nikwax’s Tech Wash ($10 for 10 oz at REI). Afterwards, hang all Dyneema gear out to dry rather than putting it in a dryer.
How to repair Dyneema
Another unique Dyneema issue is patching tears. You can field-repair Dyneema fabric with a Tenacious Tape patch, but you don’t want to sew patches on, as it can compromise the waterproofing of the material.
A permanent fix requires Dyneema tape or a patch like those offered by Zpacks. These are designed to stick to non-DWR-treated Dyneema, and should be placed on the inside of packs and shelters (it won’t stick to a treated exterior.) Once applied, it provides a permanent bond and isn’t likely to peel off over time. However, as with any stick-on patch, it’s best to round its corners to make it less likely to catch on anything.
