Products You May Like
Get full access to Outside Learn, our online education hub featuring in-depth fitness, nutrition, and adventure courses and more than 2,000 instructional videos when you sign up for Outside+
Sign up for Outside+ today.
Between bear bags, tent guy outs, and tarp lines, setting up camp can involve a lot of tedious knot tying. When you’re tired after a long day of hiking, you don’t want to have to deal with knots that slip or won’t come undone. Loop knots should be simple to tie and untie, and with these tips and some practice, you’ll be able to tie them no matter the conditions. Here are a few foolproof options.
Need a primer on knot terminology? Check it out here.
Bowline Knot

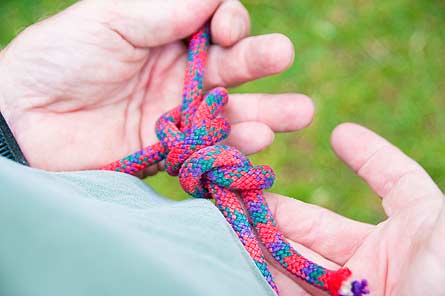
A bowline knot is a perfect choice for security. The knot is simple to learn, snug, and strong, especially when tied off with an overhand and a half hitch. It’s also ideal for emergency situations, as it can be tied with one hand if the other is immobilized. Using a single line of cord, follow the steps below to learn how to tie the classic loop knot.
Using a single line of cord, bring the free end around your waist like it’s a belt. Lay your free-end hand atop the standing cordage, palm down. Take the free end and run it upward through the loop around the standing end, and back down through the loop in exact reverse. “The rabbit climbs out of its hole, around the tree, and back down into the hole.”
Look closely at the initial knot and how the loop is made. When tied incorrectly, the bowline turns into a slip knot.
Bowlines are strong but not that secure. If you’re using the knot to secure a person for rock climbing or for a rescue, snug up the waist loop until it’s belt-tight around the narrowest part of the body, and backtie it with an overhand and a half-hitch.
You can also use the bowline for bear bags, tent stakes, and securing a rope to a carabiner. Thread the rope around whatever object you’re trying to secure and follow the steps above. Watch this video to follow step-by-step instructions.
-Steve Howe
Backpacker’s Hitch

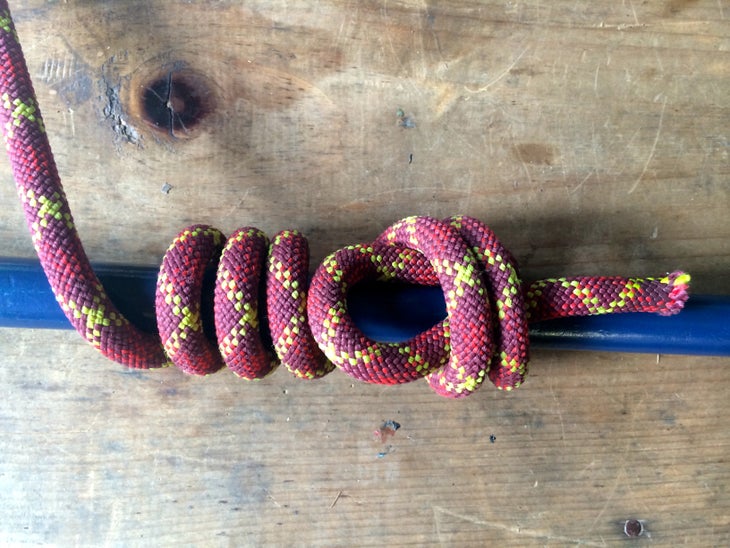
The backpacker’s hitch is for wrapping a rope around a tree, making it useful for securing your hammock, clothesline, or tent. It’s also popular for hanging bear bags. It’s not the most secure knot on this list, so use with caution in windy conditions.
Take the loose end of the rope and make at least three wraps around the tree and tuck the loose end under the last loop. The version shown is a slippery backpacker’s hitch, which can be easily untied by pulling on the loose end. Watch this video for step-by-step instructions.
-Abbey Dufoe and Dan Dufoe
Overhand on a Bight

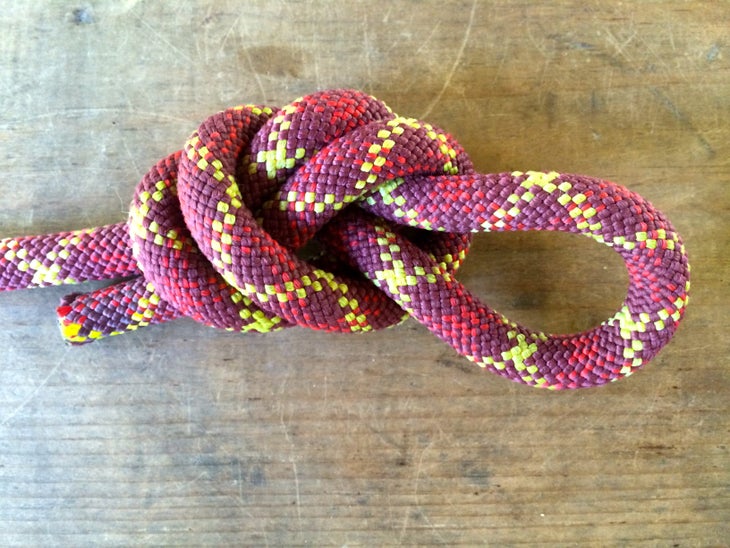
This simple knot makes an adjustable loop anywhere on a rope. Easy to tie and untie, you can use this fairly strong knot to secure tent stakes.
Take the end of the rope and make a loop, also known as a bight. Then tie an overhand knot with the loop. Watch this video for step-by-step instructions.
-Abbey Dufoe and Dan Dufoe
Taut Line Hitch

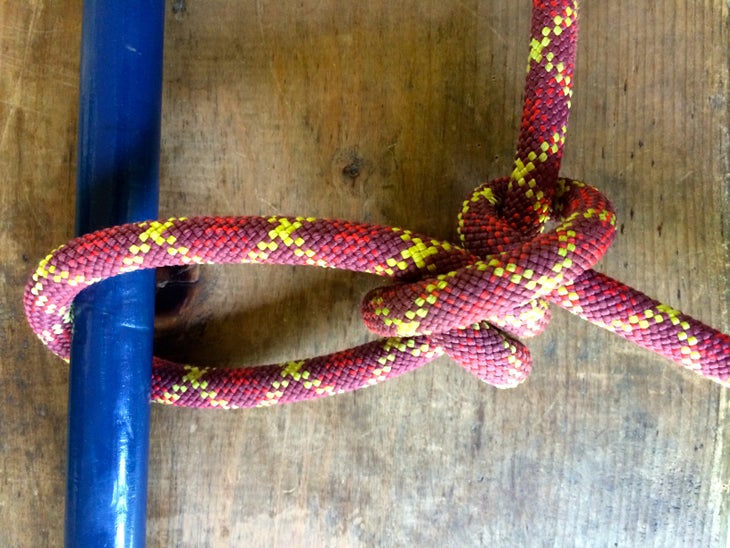
A taut line hitch is used to secure a loop in a rope with adjustable length. This is especially useful for clotheslines, tent stakes, hanging a bear bag, or tying down gear.
To tie, wrap the loose end of the rope around a tree (or tent stake or pole), then wrap that end around the rope twice inside of the loop you just made and once outside. Watch this video for step-by-step instructions.
-Abbey Dufoe and Dan Dufoe
