Products You May Like
Receive $50 off an eligible $100 purchase at the Outside Shop, where you’ll find gear for all your adventures outdoors.
Sign up for Outside+ today.
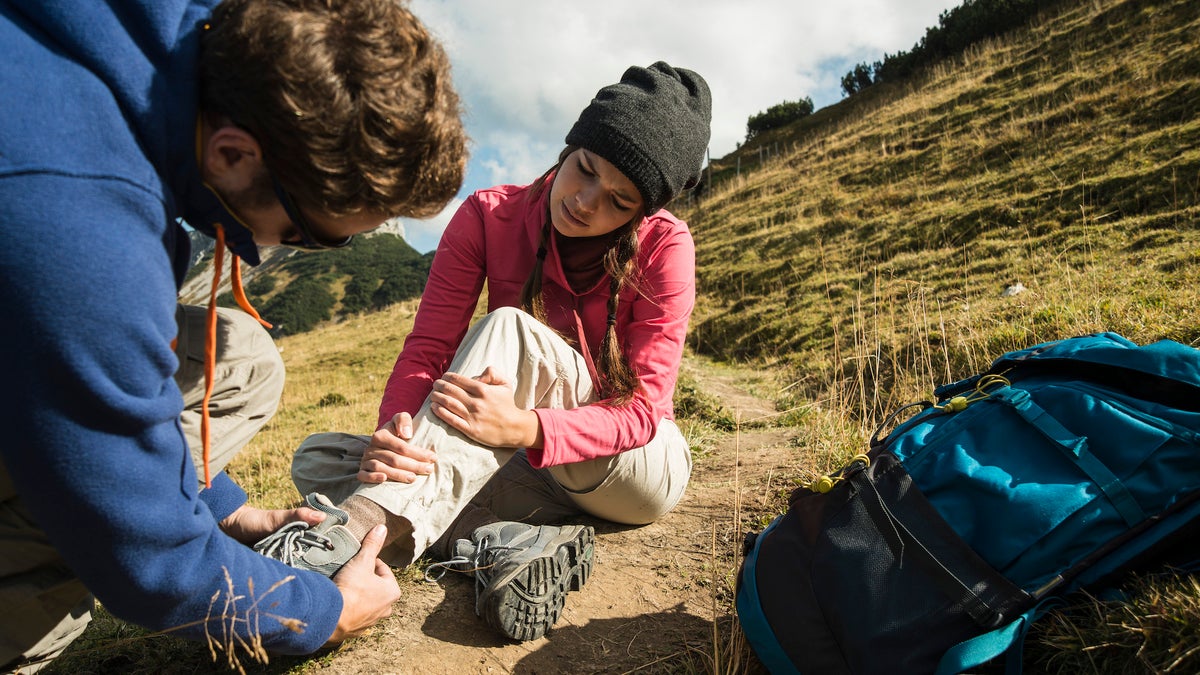
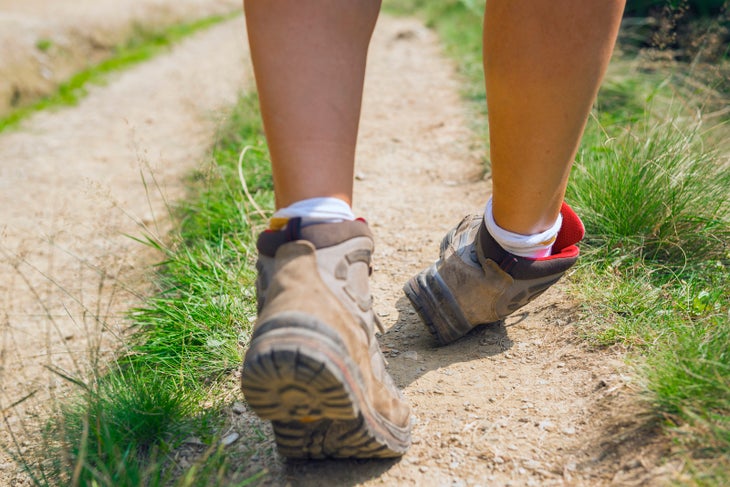
One of the best parts of backpacking is being able to explore rugged trails deep into the backcountry, but just one misstep can have you limping back to the trailhead. Injured ankles are one of the most common hiking mishaps, but they are preventable. Because of how frequently they happen in the backcountry, learning how to treat a sprained ankle—and even avoid it outright—is a great safety practice every hiker should know.
The terms “rolled,” “sprained,” and “twisted” all describe essentially the same injury: A misstep or wrong turn that overstretches the ligaments that stabilize your ankle beyond their usual point. An ankle sprain is the same injury but to a greater degree, which can require a longer recovery time.
Anatomy of a Sprained Ankle
The two big bones in your lower leg, the tibia and fibula, meet your ankle at the talus bone, which sits atop the calcaneus, or heel bone. A complex arrangement of ligaments holds it all together, and under normal conditions the ankle can withstand some eversion (turning outward) and inversion (turning inward). When an ankle goes too far one way or the other, a sprain results. In severe cases-during a leap, or when plunging downhill under a load, for instance—the tib and fib can be forced apart and ligaments are torn, which causes excruciating pain. —Buck Tilton
How to Treat a Sprained Ankle Before It Happens
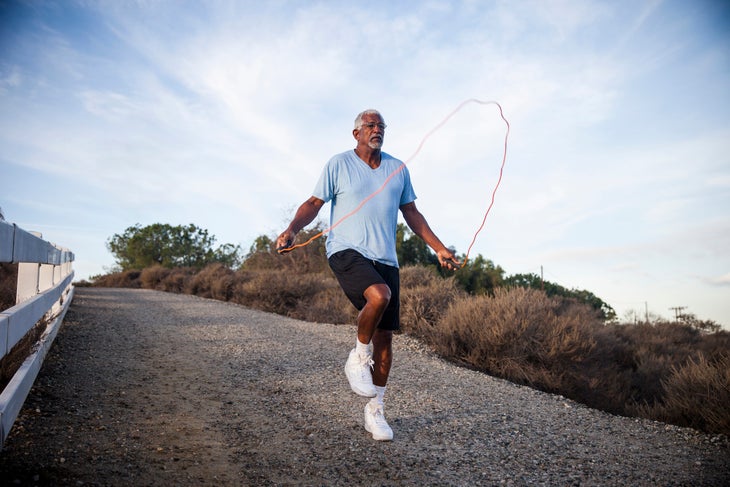
The best way to treat an ankle sprain? Prevent it. Work ankle-strengthening exercises into your routine and build up the leg and foot muscles you need to keep your ankles stable. Here are some exercises to try each day:
- Four-way Resistance Band Stretch: Sit in a chair with your right foot extended. Put a resistance band around your right foot and hold it in your hand to give it tension. While maintaining this tension, rotate your ankle inward and outward, repeating for 10 to 15 reps on each foot.
- Alphabet Range of Motion: Cross your right leg over your left, and while pointing and flexing your ankle, trace every letter of the alphabet with your foot. Switch and spell the alphabet with your left leg.
- Jumprope: Try to accumulate five minutes of jumping (can be broken up into segments) to maximize ankle strength.
- Weighted Calf Raises: Hold dumbbells or kettlebells by your side. Start with three sets of 10 calf raises with 10-pound weights.
- Eyes-closed Lunges: This double-whammy exercise works both your balance and your leg muscles. You can stand on one foot with your eyes closed to work on your balance, too.
When you’re in the backcountry, be sure to warm up before carrying a heavy pack and putting more pressure on your ankles. If your muscles, tendons, and ligaments have warmed up, they’re less likely to tear on an awkward misstep. Before putting on your pack, lean against a tree with one bent knee forward and one extended leg back, stretching the calf muscles and Achilles tendon on the back leg. Stretch each leg for 15 to 30 seconds.

Best Shoes for Preventing Ankle Sprains
Another good way to prevent ankle sprains? Double down on support. The combination of unsupportive shoes in rocky, unpredictable terrain can lead to ankle instability and injury. Mid- and high-top hiking boots are the best at supporting your ankles on unstable ground. Think of them as ankle braces built into your shoes. Read our review of the ultra-supportive SCARPA Ribelle HD boot here.
Orthopedists and physical therapists recommend high-top boots for sports and activities that cause rolled ankles, but this isn’t a get-out-of-jail-free excuse to avoid ankle strengthening exercises. If your ankles are weak, they are still susceptible to injury, and high-top hiking boots won’t fix any underlying strength issues that could be causing rolled ankles. Because your ankle doesn’t have as much movement in high-top boots, you have to make sure you’re strengthening the surrounding muscles to prevent injuries in your day-to-day life off the trail.
If your boots are worn-down and soft, then they aren’t protecting your ankles on terrain that can lead to rolls, twists, and sprains. Replace your boots with a new, stiff pair.
Improvising an Ankle Brace in the Backcountry
Materials:
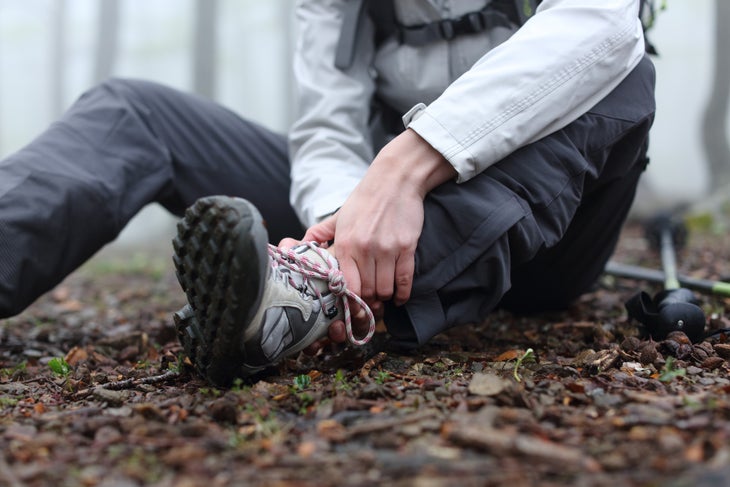
How do you treat a sprained ankle if you’re miles from the trailhead? You might need to immobilize it before you start to hobble out. You’ll need to something to support, pad, immobilize, and bind it together.
- Support: ACE bandage or Coban self-adhering wrap
- Pad: Clothes or fabric
- Immobilize: Foam or self-inflating pad
- Bind: Sleeping bag strap, climbing web, tent cord, tape, or bandana
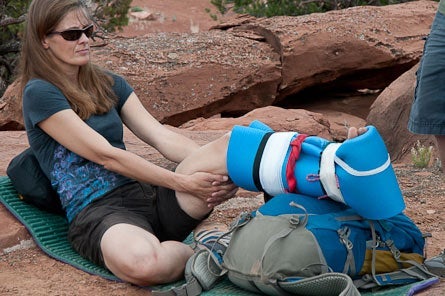
Creating the Brace:
1. The best way to treat a sprained ankle starts with R.I.C.E. (Rest, Ice, Compress, and Elevate). Sit the injured hiker down, propping their leg up comfortably, and removing shoes and socks to survey the damage. Wrap the ankle with an ACE Bandage or Coban self-adhering wrap to minimize swelling. Check the toes often to make sure there’s blood circulation beyond the bandage. If they turn blue or numb, loosen the wrap slightly.
2. Fill the spaces and contours around your ankle with padding, such as clothes or fabric.
3. Fold a foam or self-inflating pad lengthwise to immobilize the joint. Put it under the foot like it’s a stirrup, wrap it up both sides of the leg, and fasten it tightly. You can cut the foam pad to shape if needed.
4. Bind your brace together with whatever straps, cords, and wraps you have, and tighten them until the ankle is firmly immobilized. The more bindings you have, the better. Check to make sure the ankle is immobilized well.
5. Self-evacuate if possible; it’s often faster than signaling or running for help. This ankle brace is thick enough to support your ankle in rocky terrain. Your hiking partner should support you from the non-injured side while you use a trekking pole to support your injured side.
Rehabbing Your Sprained Ankle
Once you’re off trail, the rehab begins. After the initial pain and swelling have improved, most rolled ankles benefit from range of motion and weight-bearing exercises. Think about moving the ankle in circles, or practicing the motion of stepping on the gas and then letting up. Better yet, imagine sitting in a beach chair, spelling the alphabet in the sand with your big toe. Unfortunately, the most serious sprains—when you can’t walk at all immediately after the injury—require further evaluation from a medical professional to make sure that nothing’s broken, and possibly a period of immobilization before starting rehab.
Recovering from a Sprained Ankle
Your rolled ankle recovery depends on the severity of the injury itself. There are three levels of ankle injury:
First-degree injuries, the most common type, occur when ligaments stretch without tearing. You might feel pain when moving your foot and the ligaments that got stretched, but there’s not much swelling, bruising, and instability. If you tape your ankle and take it easy, you can keep hiking and will feel healed within one to two weeks.
With a second-degree injury, your ligaments are slightly torn, which causes them to bruise and swell. The pain might prevent you from moving your foot or applying much pressure to it; complete healing could take up to six weeks. A second-degree ankle injury can also be taped, but just so the person can make it back to the trailhead. Some items in the backpack should be distributed among other group members. This lessens the pressure on the injured hiker while limping back to the trailhead. Walking will be difficult but doable.
There is a complete ligament tear in a third-degree injury. It’s common to confuse a third-degree injury with a broken ankle because of the “pop” or “snap” that happens when the injury occurs, constant intense pain, bruising, joint tenderness, and swelling. Within 30 minutes of the injury, you won’t be able to move your foot because of the swelling and pain. A splint and immediate medical attention is the best way to treat a sprained ankle with this degree of injury. These can take six months or longer to heal completely, and 10 to 15% of these cases might require rehabilitative surgery.
Take your outdoor first aid skills to the next level by joining Outside+. Members get access to our entire archive, as well as online classes and print subscriptions from Backpacker and our partner publications.